Tuesday, September 22, 2015

Not By Bread Alone


Tomorrow is the natal day of NoHandle, my dear brother who sometimes, including today, is a guest blogger here. Happy Birthday a day early NoHandle. He and I were close as children (except for when he was taking delight in teasing me) and I was always interested in and a bit in awe of his passion for electronics, such as ham radio. I still remember that when he went away to college that I offered to be the one to help clean his room because I was willing to take each dustpan of stuff swept from the floor and extract the transistors, radio tubes and bits of coated wire and save them for him for his return. Now we live too far away from each other to visit very often, but through the ease of the Internet, another magical (to me) electronic device, we can share our passion for cooking. He is an excellent cook and this time has given us another imaginative use of the seasonal favorite, zucchini, this time giving that excellent if prolific vegetable a chance to play at being another vegetable. Read on!

Not by Bread Alone

My last post talked about Zucchini bread as a vehicle to deal with the bounty of the fruit that seem to engulf us every year. The season is declining, but I wanted to talk about another aspect of this abundance, overly large fruit, and how to deal with that.

A number of years ago my uncle Ray (I usually call him my obscure relative, because he is my mom's half-sister's husband. But practically speaking, he's my uncle.) brought me a zucchini from his garden that must have eluded his attention for quite a while. If you garden, you've had that happen too. It was so big that its seeds were well established, the squash bigger than my forearm. I hadn't cooked zucchini before, at least one that large, and I was somewhat at a loss as to how to proceed. My inspiration was eggplant, for which the Italians (he's one) have a politically incorrect nickname, and he explained that too. What I did was substitute zucchini for the eggplant in Eggplant Parmesan. First I extracted the seeds, then sliced the rest long-ways, and layered the strips with spaghetti sauce, topped with cheese, both mozzarella and Parmesan, and baked.

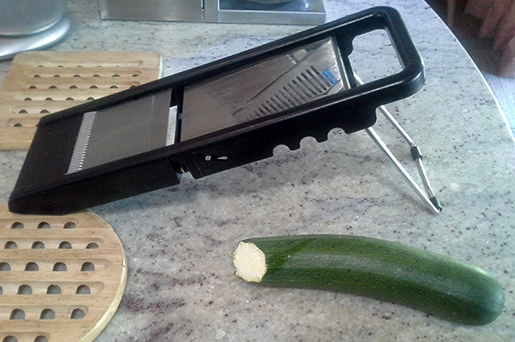
When another similar but somewhat smaller renegade appeared in my garden recently, I decided to replicate that earlier recipe. BTW, the one in the picture is smaller yet; you can use them too, it just may take more than one. 


The best recipe I found online (thanks Kraft) also included sliced mushrooms, and that sounded good to me, so I used that to re-inspire my efforts. In this case, the seeds weren't a problem so I simply sliced the zucchini using a mandolin, set to about a 1/4 inch thickness, not even peeling, and stacked them up to assemble the dish. 


I put a layer of them down in a 9 inch by 13 inch glass baking dish, covering the bottom, and topped them with sliced mushrooms, and sprinkled them lightly with jarred spaghetti sauce, pizza sauce works too, and is about the right amount; almost any sort will do.


 A word about mushrooms though. I chose the largest whole white mushrooms I could find and sliced them about as thick as the zucchini, but by hand. I could have used pre-sliced mushrooms, but they are smaller, thicker, and wouldn't cover as well. You could slice Portobellos too, they are nice, and are what you see in the photos here.


Continue alternately stacking zucchini strips, sliced mushrooms and sauce until you run out of zucchini (about three layers). Go gently with the sauce, it doesn't take as much as you might think. Bake until the veggies are tender. 


Finally, sprinkle liberally with  mozzarella, and top that with the Parmesan. I used more than the recipe called for because that is the signature of the dish, after all. Then back to the oven to melt and brown the topping. You can also just put the cheese on before baking, and get a nice browning.
 

Serving is a matter of cutting across the vegetable strips and moving carefully to a plate. You can serve four to six people with a single zucchini, depending on how much they like their veggies. If there aren't that many of you, the leftovers are great too.

Ingredients:
1 lb. large, (or if larger, seeded) zucchini, up to 1.5 lb., sliced about 1/4 inch thick
½ lb. large mushrooms sliced
1 cup of your favorite spaghetti or pizza sauce
1 cup of low-moisture, part skim mozzarella cheese, shredded (10-12 ounces)
½ cup Parmesan cheese, shredded (not the ground stuff) better quality helps; I used a Reggiano.

Directions:

Heat oven to 400 degrees F. Coat 13 x 9-inch baking dish with cooking spray. Layer the vegetables and sauce in the dish. Bake for 25 minutes. Top with the cheeses. Return to the oven and bake an additional 5 minutes or so, until the cheese melts and starts to brown. Cut into portions and serve immediately.

Sunday, September 20, 2015

A Seasonal Cake


The Cake Slice Bakers are winding down on our current book The Southern Cake Book by Southern Living Magazine. This month we were able to choose between a Black Forest themed cheesecake, a Caramel Coconut cake which used brown sugar to get the caramel flavor, Baby Sweet Potato Cakes with a sticky Pecan glaze, or my seasonal choice, Chocolate Zucchini Cake. "Adding fresh zucchini to the batter yields luxuriously dense, moist results."

Due the the extreme heat we had a little while ago, the zucchini production slowed down, but I still have plenty and this cake was perfect for making cupcakes for a potluck I attended. I didn't bother with making the batter gluten free nor dairy free since I wouldn't be eating these, so I made it following the recipe in the book, except for the icing. I used my food processor to grate the zucchini, so some of the threads of zucchini were a bit long, but they all broke down and disappeared into the cakes, creating a nicely moist crumb. There was on slight variation - I used chocolate chips instead of chopping the chocolate and no one seemed to mind. I made cupcakes for ease of serving...and because they are cute! Look at the great crumb on the cupcake below.


According to my taste tester (Sweetie) these are delicious little cakes and don't really need any icing. For the cupcakes for the potluck I used a modern version of 7-Minute Frosting because I was using it for the sheet cake I also baked for the potluck (as the birthday cake requested), so I had plenty for the cupcakes. The fluffy white frosting made a nice contrast to the deep, dark chocolate cake of the cupcakes. From the looks of it I would imagine that the chocolate icing in the book is delicious, too.


I think this is going to be my go-to recipe for chocolate zucchini cake. It has great flavor, excellent crumb and texture, and uses up some zucchini, too! I did use a high quality cocoa and recommend that you do that too if you have some on hand. Party on.


Friday, September 18, 2015

Almost A 'My Mother Used To Make This' Frosting


I made a birthday cake for a dear friend this week and decided that my cake icing skills were so rusty that the best bet was 7-Minute frosting. You may know of this stuff...fluffy, white like a marshmallow, soft and sweet, with a flavor mostly of sugar. My mom used to make it for my older sister's birthday cake, then cover the frosted cake with grated coconut. It was wonderful! I learned how to make it when I was about 10 and it wasn't my favorite because you had to hold a hand-held mixer over hot water for at least 7 minutes, which is a long time for a kid.

At my friend's party lunch, once the cake was served, I heard all around the table, "My Mom used to make this frosting...it's boiled frosting, right?" I assured them that it was very much like the frosting their Moms used to make, but with a wonderful difference. For this frosting, the ingredients (egg whites, sugar, corn syrup and a pinch of salt) are whisked over simmering water until the sugar melts, but then are put on a stand mixer and the whisk attachment gets put at medium speed to do the rest of the work. It's like magic I tell you...easy and beautiful frosting, too.

One of the delights of this frosting is that you almost automatically make beautiful swirls and peaks just by spreading it on the cake. I glammed it up by putting on multi-colored sprinkles, little silver dragees and Autumn Mix candy corns and pumpkins. There were even candles at serving time. Of course I forgot to take a photo of the full cake, but I did take a photo of the cupcakes that I also made and which had similar decorations on that fabulous frosting.

It may be a while before I post the cake, but I wanted my friends to have the frosting recipe now so that they can give their family a blast from the past by making this icing for their family's next cake.

We can all thank Nick Malgieri for the ease of his method for making this treat with modern appliances.


Fluffy White Frosting – a version of 7-Minute Icing

3 large egg whites (scant ½ cup)
1 cup sugar
pinch of salt
1/3 cup light corn syrup

Half fill a 1 ½ quart saucepan with water and bring to a boil. Lower the heat so the water simmers.
Use a hand whisk to combine the egg whites, sugar, salt and corn syrup in the bowl of a heavy-duty mixer. Place the bowl over the pan of simmering water and gently whisk until the ingredients are hot (about 130 degrees) and the sugar has dissolved.

Attach the bowl to the mixer and whip the icing with the whisk attachment on medium speed until cooled, about 5 minutes: touch the outside of the bowl – it should feel cool.

Use immediately to fill and cover a cake.

Makes enough for filling and covering a 9-inch two-layer cake.


Recipe from Perfect Cakes by Nick Malgieri

Wednesday, September 16, 2015

Babes Bake Shells


The wonderful Kitchen of the Month hostess, Heather of Girlichef, chose Conchas as the September bread for the Bread Baking Babes. Conchas are Mexican sweet rolls with a sort of sugar cookie topping that is incised in shell patterns. Although you can use natural colors including cocoa, finely ground freeze dried fruits and matcha tea, I went with gel food colors this time for my topping. The end result was so pretty!

I tried to make these in a gluten free version, but that was a washout. I used butter flavored shortening instead of butter and I guess the totality of the oil was too much for the little yeasties. They barely grew, even when I added more flours and yeast after the first rising time produced little result. The taste was OK and the topping was delicious, but the rolls themselves were the opposite of light and fluffy, more like dry and crumbly and pretty flat. I will probably try making them with butter and regular flour and just have Sweetie eat them. I'm beginning to think that the GF sandwich bread success was a fluke.


I'll almost guarantee that if you make these that they will be better than mine. The link for the full recipe on Girlichef is at the bottom of the Sugar Topping recipe. To become a buddy, bake the conchas, send a photo and link to your post to Heather and do it by September 29th. Would love to see your beautiful conchas! Also, be sure to check out all the other Babes sites. Will be trying to do the linky thing and if I am successful, links to Babes posts will be at the very bottom of this post.

I'm not going to give any recipe for the rolls because the results were so poor, but I will give my topping recipe, just in case you want to try GF topping. Here is what they looked like right after I added the toppings.


Sugar Shell Topping for Conchas: 

1/3 cup granulated sugar
2 tablespoons confectioners sugar

1/4 cup margarine or shortening (I used Earth Balance margarine)
1/2 cup all-purpose flour, plus more for dusting (1/4 cup almond flour and 1/4 cup tapioca flour)
1/2 teaspoon vanilla extract
Assorted gel food colors

While your conchas are doing the initial rise, make the sugar paste topping: Beat the sugars and margarine together until light and fluffy. Stir in flour and mix until a thick dough forms. Add additional flour if needed. Divide dough into 3 or 4 even pieces and tint each with food color. If the dough becomes sticky from the food color, add more flour. Cover the sugar toppings with plastic wrap so they won't dry out until you need them to top the formed conchas.

Making the Sugar Topping:
Divide your sugar topping into 12 or 16 equal pieces (same number as dough balls). Roll out the sugar paste pieces on a lightly floured surface (I used confectioners sugar instead of flour). Cut into 2 1/2-inch rounds with a cookie cutter (or pastry ring or ring with diameter to fit top of concha, covering whole of top). Use the pastry ring to score lines into the paste to resemble the ridges on a seashell (concha). Don't cut all the way through the paste if possible. Transfer the scored sugar paste rounds to the buns using an offset spatula. If the paste doesn’t want to adhere naturally, use a pastry brush to apply dots of water on the underside before applying to the buns.

Let buns rise as directed in the conchas recipe, bake, cool and enjoy.

Monday, September 14, 2015

Apricot Scone with Almond Flour


Although I had a really bad loaf of bread recently using gluten free sourdough starter and buckwheat flour, in general I'm starting to get the hang of gluten free baking. Recently I made some delicious scones with dried apricots. I used King Arthur Flour almond flour and white rice flour, plus some tapioca flour to replace the all-purpose wheat flour and I increased the baking soda to a teaspoon, plus used yogurt and water instead of buttermilk, but otherwise it was pretty much the same as one I baked before. I big difference was using very cold butter flavored vegetable shortening instead of butter. Needless to say, it doesn't taste like a wheat flour/butter scone, but it was tasty and the texture was pretty good, if just a bit gritty from the almond flour.

In case you are keeping track, I cut the last pieces today for Phil's stained glass piece and finished the copper foiling. Hope to work on it some more tomorrow.


Apricot Almond GF Scones

Heat oven to 425 degrees F. Grease a cookie sheet.

3 cups all-purpose flour (substitute equal parts almond flour, white rice flour and tapioca flour)
½ cup sugar
2 ½ teaspoons baking powder
1 teaspoon salt
1 teaspoon baking soda
¾ cup unsalted butter, at room temperature  (substitute equal amount very cold butter flavored vegetable shortening)
¾ cup finely diced dried apricots
1 cup buttermilk (substitute 3/4 cup plain yogurt mixed with 1/4 cup water)
1/2 teaspoon almond extract
2 egg yolks

Combine flours, sugar, baking powder, salt, and baking soda in a large bowl. With pastry blender or two knives, cut in vegetable shortening until mixture resembles coarse crumbs. Add diced dried apricots.
Combine yogurt mixture and almond extract in a bowl or measuring cup. Whisk in the egg yolks. Pour over crumb mixture. Stir together with fork just until mixture comes together. Gather dough gently into a ball; knead 4 or 5 times to make sure all components are combined well.

Cut dough in half and transfer pieces to prepared cookie sheets. Shape each piece into a 6 inch x 1/4 inch thick circle. Using floured knife, cut each circle into 8 wedges.

Optional: Brush top with egg beaten with 1 tablespoons water, then sprinkle with sugar.

Bake 15 – 20 minutes until toothpick inserted in the center comes out clean. Serve warm or at room temperature.
Makes 16 scones.

Friday, September 11, 2015

Almost Salad Nicoise


Classic Salad Nicoise has tuna, potatoes, green beans, hard cooked egg, black olives and salad greens with a garlic dressing. For dinner one evening this week I made my own version which had many of those elements, but I decided on a citrus-mustard dressing. Sweetie had bought some beautiful tuna steaks and grilled them so that they were still very pink inside, then he sliced them to put on top of the salad.

I cooked red potatoes and green beans and kept them hot while I made the dressing. The salad greens were comprised of romaine, iceberg, red cabbage. There were also some non-traditional carrot slices. When the tuna slices were ready I drained the potatoes and green beans and put them on top of the salad greens in a large bowl. The dressing when on next and it was all tossed together. Because I forgot to cook them ahead of time we didn't have hard cooked egg. Because I really don't care for olives, those were not included either. As you can see, not a classic at all, but still an interesting dinner for a hot evening. Our plates were piled with the dressed greens mixture and the tuna slices placed on top, to one side. I really enjoyed the contrast between the icy salad greens and the warm potatoes, beans, and tuna. An additional salad of fresh tomatoes, sliced, then dressed with balsamic vinegar, olive oil, and pepper completed the plate. It was delicious!

We have been having a heat wave with three straight days of 102 degree highs, preceded by a couple of days around 100 degrees and followed today by a high in the 90s. It should be in the 80s tomorrow and I am very grateful. Hot weather has never been my thing.

Citrus Mustard Dressing

grated zest of 1/2 medium orange
grated zest of 1/2 lemon
grated zest of 1/2 lime
juice of 1 lemon
juice of 1/2 lime
2 teaspoons Dijon style mustard
salt and pepper to taste
about 1/4 cup good quality olive oil

Place the grated zests and the citrus juice in a small bowl. Whisk in the mustard, salt and pepper. Continue whisking and very slowly add in the olive oil.

Thursday, September 03, 2015

A Bread For Zucchini Madness


It happens every year...too many zucchini. It may be from your own plant, it may be the sneaky neighbor who deposited a big bag of them on your porch early in the morning, or maybe you got carried away at the farmer's market. Now you are looking for ways to use them up...look no further.

My great good friend NoHandle sent another wonderful guest post. You are going to want to make this zucchini bread my friend. If you really like it, maybe I can get some of my extra zucchini to you (just kidding). The best part about this bread is there is no chocolate. Although I love chocolate, it doesn't love me at present. Thanks NoHandle!

Zucchini Bread Again?

Perhaps the only thing more pervasive than the excessive production of the zucchini plant (it would be considered a weed if the fruits weren't edible) is the profusion of recipes you find about now to create uses for the aforementioned excessive production. Leaving bags of the stuff on neighbor's porches can go undetected for only so long, and then they force you to stop. And no fair setting the bag on fire; that is a different prank. 

At any rate, I noticed, in my hour of need, that  my favorite blog (this one) had almost all chocolate zucchini bread recipes, and so cried out for a non-chocolate rendition. (I'm a big fan of chocolate, but not everyone in the household is, and I don't want to be the only consumer of the bread; that would partially defeat the purpose. She really likes this one.) So, I cast about and found a decent looking one on the Food and Wine site. It had only one ingredient that I didn't currently have in the cupboard (and that was just a matter of timing) so I printed a copy and off I went.


To begin with, most recipes say a “medium” zucchini produces 1 cup of shredded (and squeezed out) flesh. I must have had a monster then. It produced a bit over three cups, so although the (doubled) recipe called for two cups, three cups it was to be. The remaining quarter of a cup or so went to compost.


The next issue was with the yogurt, for which the recipe the recipe called “non-fat” which in my mind meant “not really food” and the grocery store was apparently in the former camp. I ended up with a honey-flavored full-fat product, which meant there was a measure of sugar in it. The amount of sugar called for in the recipe seemed excessive, so I didn't feel bad about cutting it back in this case. I also ended up a bit short on the flour, so in included a half-cup or so (I didn't measure it) of whole wheat flour to round it out. With the extra zucchini, I wasn't too concerned with exact measurement, I just added a bit to just about everything (except sugar and oil; with full-fat yogurt, I slacked off on the oil too). And of course this was double the recipe (two loaves instead of one) which led to needing an extra large bowl to combine everything where the recipe called for only a large bowl. I think we've all been there when scaling up recipes. Mine was a glass salad bowl.


Oh, the recipe calls for coarse chopped walnuts, but we prefer smaller bits, so I used my trusty nut grinder, which produces bits about the size of half of a lentil, and smaller.


My other departure was to not consider sugar a “wet” ingredient, and including it with the dry. I mixed the eggs and oil first to create an emulsion, then added the yogurt, which preserved it. The dry (plus sugar) ingredients were already combined, so I added some shreds, and some of the liquid, to the dry, mixed that up, and added the rest. I don't have a stand mixer, but I recommend one for this application. Mix at slow speed, as the flour and batter tend to fly. My heavy-duty hand mixer was adequate to the task, but a lesser one might have started smoking, quite literally, from the strain, and that would have ruined the aroma from baking. It is a very, very dense batter. I also poured the batter alternately into the pans to keep the results consistent. I weighed them both to ensure they had about the same amounts. It was about 56 ounces each (including the weight of the pan, a bit over a pound) in case you were wondering. 

The baking time is a rather lengthy hour and ten minutes, and with two moist cakes in the same oven, a bit longer is better. I was satisfied at one hour and fifteen minutes, but another five or so wouldn't hurt. There is another long wait as the loaves cool, at least a half-hour. This is quick bread for the patient.


Note that even with surplus zucchini the pans were not quite full when baking was done. Freeze at least one to bring back memories of the closing days of summer (and the bounty of the zucchini plant) in the midst of winter, and enjoy the other while still warm (and for a few days thereafter). 

Your neighbors will appreciate this more than the raw fruit, so bake some more! (You have more zucchini, don't you?)

Here is the recipe as I did it. The measurements are approximate, but this is forgiving one.

Zucchini Bread

Ingredients:
1 ½ cup walnut halves
4 cups all-purpose flour (substituting about ½ cup whole wheat flour works too)
1 tsp. baking powder
1 tsp. baking soda
1 ½ cup sugar (scant)
4 large eggs
¾ cup vegetable oil (I used pure olive oil; not extra virgin nor even virgin. It has nearly no olive taste.)
1 cup honey-flavored Greek yogurt
3 cups coarsely grated zucchini, squeezed in a ta towel to remove as much liquid as you can

Directions:
Preheat the oven to 325 degrees. Butter (or cooking spray) and flour two 9-by-4 ½ inch metal loaf pans. Spread the walnut halves on a small (cookie) sheet pan, and toast them for about 10 minutes, until they are fragrant. Cool them in the freezer for 5 minutes while you make the batter, then chop in fine pieces.

In a very large bowl, whisk the flower with baking powder, baking soda, and salt. If you combine the sugar at this point the dish still works. In a medium (medium is still big enough) bowl, beat the eggs and vegetable oil together until well combined, and then beat in the yogurt. Add the wet ingredients to the dry ingredients, along with the grated zucchini and toasted, chopped walnuts. I found adding about 1/3 first of both, beating, and then the remaining made the process easier and the result smoother. Beat until the batter is evenly moistened.


Pour the batter into the prepared pans and bake for 1 hour 15 minutes, until the loaf is risen and a toothpick inserted in the center comes out clean (about 195 degrees in an instant read thermometer).

Let the loaf cool on a rack for 30 minutes before un-molding and serving. A few additional minutes cooling of the released loaf will make slicing easier, as the center is still fairly moist.


Enjoy, NoHandle.

Tuesday, September 01, 2015

Harvest Time Combo


September is finally here. That means a number of things, but two that thrill me are that fall is just around the corner and that the garden is producing at capacity, with lots and lots of delicious veggies, herbs and fruits to enjoy.

The smaller tomatoes have been prolific for weeks, but the large tomato plants (this year only three plants-because of the drought-and all the Black Krim variety) are just now providing ripe fruit to enjoy. My favorite way to enjoy them is sliced, with some olive oil and balsamic vinegar splashed on, a grinding of black pepper, and a sprinkle of chopped basil lending both fragrance and flavor.

One of my favorite recipes using the smaller grape tomatoes is Mediterranean Couscous with Chicken, but wheat couscous is off my list of foods at the moment. I was pleasantly surprised to find Lundberg's brown rice couscous at the store Monday morning. They are a California company that grows all sorts of rice, so I bought a box and immediately thought of making that recipe. I had some chicken, the lemon, basil and small tomatoes and, although it would effect the flavor, I decided to forgo the feta cheese since cheese is also off the list. The pine nuts would come from my fridge, not the couscous box, and would be for Sweetie...yes, another food not on the list. Actually we never did get the pine nuts on this dish but I did get a nice phone visit with our daughter instead.

It has been very warm around here for the last week or so and I have been sort of hibernating, especially in the afternoons. If we cool down the house overnight and then close the downstairs windows and connecting doors, the downstairs keep pretty cool until dinner time. I have been doing a lot of reading. In the mornings when it is cooler, I've been working on a stained glass piece I'm making for my younger brother's round number birthday. It's been ten years since I've done any stained glass work, so my skills are rusty, but I finally have all the pieces ready and on the lightbox and it looks pretty nice. Now for foiling, fluxing and soldering. It may not end up being a perfect piece, but I think it will be lovely and suit my brother, too...although he may be perfect.


The brown rice couscous is prepared differently than regular couscous, which is basically steamed. With the brown rice version you begin by simmering the broth and couscous, then taking it off the heat and letting it steam. It adds about 15 minutes to the process, so build that into your meal prep plan. You can increase the lemon zest and lemon juice and it will be even better. I decided that about 2/3 of the tomatoes (picked right before dinner) were plenty but go for the whole amount if you just love cherry tomatoes.


Mediterranean Chicken Couscous
Serves 8 (more if part of a buffet or potluck)

1 1/4 cups low-sodium fat-free chicken broth
1/4 teaspoon dried thyme
1/4 teaspoon poultry seasoning
1 (5.6 oz.) package Lundberg brown rice couscous
3 cups chopped cooked chicken (or turkey - I used roasted turkey thigh meat)
1/4 cup chopped fresh basil
1 pint cherry or grape tomatoes, halved
1 1/2 tablespoon fresh lemon juice
1 teaspoon grated lemon rind
1/4 teaspoon freshly ground pepper
Garnish: fresh basil leaves

(Note: You'll need to buy a 2/3 oz. package of fresh basil and 1 rotisserie chicken to get the right amount of basil and chicken for this recipe. Substitute 3-4 teaspoons (I used 3) dried basil if you can't get fresh. 3 cups of leftover cooked chicken or turkey in large dice works fine, too.)

Place chicken broth in a medium saucepan and bring to a boil. Add the dried thyme and the poultry seasoning.  Place couscous in the pot, and stir. Cover and simmer over low heat for 11 minutes, then remove from the heat, keep covered, and let stand 10 minutes. Fluff couscous with a fork, stir in chicken and next 5 ingredients. Serve warm or cold. Garnish with fresh basil leaves or a sprinkle of toasted pine nuts, if desired.