Tuesday, September 30, 2014

Squash and Carrots


Although I love dessert, one can't live, or at least not very well, with a diet of sweets. Because I try to get a few servings of veggies every day, it is worth the time and effort to have a garden and/or buy from farmers markets. You get fresh, seasonal produce that way, and it's almost always local produce.

It's still summer squash season, although the harvest is winding down. We usually grill slices along with whatever Sweetie is putting on the grill, but sometimes I want a different treatment. Last week I made a wonderful saute with zucchini squash, carrots and patty pan squash, plus some chopped Italian parsley, a little garlic and just enough water to keep the veggies from sticking during cooking. Because they were so fresh they didn't need anything else and were delicious.

I cut the patty pan squash into quarters and cut the carrots and zucchini into sticks, trying to keep their shapes about the same so that they would all cook in about the same time. One thing I made sure of was to only cook them until I could insert the tip of a sharp knife. I like my squash with some bite to it. Sweetie likes his carrots that way, so we were good to go. If you look carefully you'll see the lone green bean that was on the bean bush. More are coming in now, but then it was the lone bean!

Friday, September 26, 2014

Chocolate Works With Irish


Well, chocolate works with almost anything, really. Still, this recipe is for a dense, moist, decadent chocolate cake made with liquor. Usually I make it with bourbon, but for our party last weekend I made it with Irish Whiskey and Scharfferberg semi-sweet chocolate and baked it in a beautiful star studded Bundt pan. It was so pretty that I left off the usual chocolate ganache topping and just sifted on some confectioners sugar...and it was still a hit.

Bookmark this cake if you want a cake that is easy, impressive, rich, goes together quickly, and...best of all...very, very chocolate. If you make it ahead you can douse it with whiskey and wrap it up in cheesecloth and plastic wrap and it will get even better. Because it is so rich I usually serve thin slices, so it serves quite a few people, too. Once the party was over we didn't want so much temptation sitting in the kitchen, so Sweetie took a nice big chunk of it over to Spoiled Rotten Farm, where it was much appreciated, too.


86-Proof Chocolate Cake
from Maida Heatter's Book of Great Chocolate Desserts

Soft butter for the pan
dry bread crumbs (about 1/3 cup)
1 teaspoon cocoa powder
5 oz. unsweetened chocolate (I used semi-sweet and it was fine)
2 cups sifted all-purpose flour
1 teaspoon baking soda
¼ teaspoon salt
1 cup cold strong coffee
Cold water
½ cup Irish whiskey
½ lb. (2 sticks) sweet butter
1 teaspoon vanilla
2 cups sugar
3 eggs (large or extra large)
Optional: confectioner’s sugar

Preheat oven to 325 degrees F after putting oven rack 1/3 up from bottom. Butter a 10 cup capacity Bundt or other fancy tube pan. Dust the whole inside with fine, dry bread crumbs that have been mixed with a teaspoon of cocoa powder. Invert pan over a piece of paper and tap lightly to shake out excess crumbs. Set the pan aside.

Melt the chocolate in the top of a small double boiler over hot water on low heat (or microwave one minute at a time at half power, stir, continue until melted and smooth). When melted, set aside to cool slightly.

Sift together the flour, baking soda and salt and set aside.

In a 2-cup glass measuring cup place the cold strong coffee. Add cold water to the 1 ½ cup line. Add the Irish whiskey. Set aside.

Cream the butter in a large mixer bowl. Add the vanilla and sugar and beat to mix well. Add the eggs one at a time, beating after each addition. Add the chocolate and beat until smooth. Scrape bowl and beaters often.

Then, on low speed, alternately add the sifted dry ingredients in 3 additions with the liquids in 2 additions, add the liquids very gradually to avoid splashing. Continue to scrape bowl and beaters often. Inhale the wonderful fragrance of chocolate mixed with Irish whiskey!

Pour into the prepared pan. Level the top. Bake for 1 hour 10 minutes or 15 minutes until a tester in the middle of the cake comes out clean and dry.

Cool in the pan for about 15 minutes. Then cover with a rack and invert. Remove the pan, sprinkle the cake with a bit of optional Irish whiskey if desired, and let cool.

Move to a serving plate. If desired, sprinkle the top with confectioners sugar through a fine strainer.

Cake is wonderful as is or can be served with whipped cream or vanilla ice cream.


Monday, September 22, 2014

Smashed!


A few nights ago I wanted a tasty side dish for some grilled pork chops. Fortunately I had small red potatoes in the pantry and it was cool enough to fire up the oven to a nice high temperature. Smashed potatoes with nice crispy brown bits on the edges and bottom were the hit of the evening.

These are easy to make and just a bit different from French fries. For one thing they aren't fried, although a generous hand with the olive oil makes 'em extra delicious. For another thing, you can jazz them up with herbs and/or spices, or keep them simple with salt and/or pepper.

Since the potatoes I used were small - about golf ball sized - I boiled them in unsalted water until tender, then cut them in half. If you have to use larger sized potatoes, you might want to cut them into chunks before boiling them. They will cook faster that way. You can make this using small Yukon gold or similar waxy potatoes, too.

The halved potatoes were put on a baking sheet that I had lined with heavy foil and then glazed with olive oil. I've done this recipe using a silicon baking mat to line the pan, but the clean up was really messy. With the foil all of the excess oil gets tossed along with the foil after you serve up the smashed potatoes, which is much easier.


Once the potatoes are on the foil, spread them out. You want about two inches between potatoes. Then use a potato masher or strong metal spatula (pancake turner) to smash the potatoes. You want to partially flatten them, but not smash them into tiny chunks. Take a look at the photo to get an idea of how much to bear down.

At this point you can do as I did and just sprinkle on salt and pepper, and/or you can sprinkle on chopped fresh herb or dried herbs or spices like cumin, paprika or cayenne pepper. I used some dried rosemary. Then drizzle with some more olive oil. Be generous if you want crispy results. You can use flavored oil, too, like garlic olive oil or truffled olive oil if you are feeling decadent.


Place the smashed and seasoned and drizzled pan(s) of potatoes into a preheated 500 degree F oven. Bake for 6 minutes, then check them to see if they are done enough for you. Some folks like the skin to still be a little soft and lightly golden, but others, like Sweetie, like a lot of crispy skin and for it to be nice and brown. If it's not done enough, bake for another minute or two and check again. Keep doing that until done to perfection!

I found that about 5 of the smashed half potatoes was a nice portion, but hearty appetites will require more. These are so good that you may want to start with a minimum of 6 small potatoes and go from there.

I usually start these about a half hour before we eat. That gives you enough time to boil and halve the potatoes, preheat the oven, arrange and smash and season the spuds, and then time to cook them to the best crispy, crunchy, delectable potatoes you can imagine.

Thursday, September 18, 2014

Tie Dye In A Cake


If someone were to ask you to name a few of the iconic fashions of the hippie era, you might say bell bottoms, fringe, items with peace symbols on them, ponchos, and...tie dye. Some of the other icons have disappeared, but tie dye is still around, at least in N. California. We have a shop down the road not ten minutes away that sells all manner of clothing items...including long underwear with a button seat flap!...and they are all tie dye.

I'm old enough to have seen it the first time around and I even know how to tie cloth and dip it in dye to get wild multicolored circles and swirls. I guess that's why my daughter's desire to bake a tie dye cake took my fancy. Usually I shy away from too much dye in foods, but she was planning to attend a 70s party and wanted to bring the cake. The cake mix, ordered from Amazon, came in a two pack, so we decided to give it a test run for Straight Shooter's birthday. It's Duff Gordon's Tie Dye Premium Cake Mix, in case you want to order it yourself. It also comes as a single box and in a pastel version, but this vibrant cake is such fun you may want two boxes.


If you looked at the cake sitting on it's cake stand on the hutch, it looked pretty, with lots of multi-colored sprinkles, but sort of plain. Straight Shooter's eyes popped when a slice was cut from the cake and he got the full impact of all those wild, mixed colors. This cake takes a little extra work, but it was worth it.


So how do you create the tie dye effect? The batter is divided into six small bowls and then you use a specific number of drops of the included gel food coloring to create a rainbow of colored batters.


After greasing one of the cake pans, you drop a measured amount of red in the middle of the pan. Then you drop the same amount of orange batter right in the middle of the red batter, which spreads the red toward the edge of the pan by displacement. That is followed by yellow batter, green batter, blue batter, and purple batter. Each color is dropped in the middle of the puddle of the last batter. It ends up looking like a very colorful bulls eye.


You do the same thing for the second pan, then bake them.

Because I can never leave good enough alone, we did two pools of color in the second pan and started one of the pools with blue instead of red, so there were two sets of colors. That made it trippy when you cut the cake. You didn't know which colors you would see on the top layer in which order.

I think that you could probably use your favorite white cake recipe for this and some gel food colors, but if you do, be sure to put the gel colors in the bowl before mixing up the batter, and have the cake pans prepared. That way there will be less time between when you finish mixing the batter and when the cake goes into the oven.


You can frost this anyway you like, or even use rolled out fondant. We didn't rally think about the impact that having a plain vanilla frosting hiding all that color would have when the color was revealed, but that was part of the appeal.


We used the funfetti frosting...it comes with sprinkles, but we also added some multi-colored heart sprinkles that I found while I was getting ready for the remodel of the kitchen.


Combined they gave a very festive look to the cake.


I have to admit that we cleaned up all of the batter bowls and utensils outside with the hose.


We even did the batter scooping outside because it wasn't clear how messy it would be (pretty messy) and I'm not willing to find out how washable my new countertop really is yet. I know, I'm a wuss, but I want to enjoy its pristine beauty just a while longer.

So let me know if you end up making this cake, OK? It can be a blast from the past, or a fun project to do with the kids...or both.

Tuesday, September 16, 2014

Baking Bread Again


It's almost like that song ... "Falling in love again..." because I really did miss bread baking while the kitchen was torn up and now it almost seems new. Some of that is because I'm still searching for some of my equipment and supplies, but some is because working in a new space just feels fresh and different. I love it!

This month our talented and straight talking Babe, Ilva of Lucullian Delights blog is Kitchen of the Month and she has chosen Robert Mays French Bread for the Bread Baking Babes to bake. The special ingredient that makes it different from other French breads is egg white. The recipe comes from Elizabeth David's English Bread and Yeast Cookery and it was fun to make. Another somewhat unusual feature is that for the final part of the baking you cover the loaves with pots, for a better crust.

Like Ilva, I didn't cover my loaf but lowered the temperature for the last 15 minutes instead. I think the crust was just fine that way, even if it wasn't very thick. I did use a baking stone, which made for a lovely bottom crust. It was delicious and not difficult at all. The only tip I have is to start out with 8 or 9 oz. liquid (water/milk) for that amount of flour. I used 10 oz. and had to add a little more flour while kneading. If you want a really slack dough, use the larger amount, but I was going for a fairly dense crumb and it was just right. Used King Arthur white whole wheat flour for half for that nutty taste, with a milk or egg yolk wash added just before baking.


I shaped half of the dough into a crown and kept the other half as an oval loaf. I brushed the crown with milk and brushed the oval loaf with the left over egg yolk. Because I was still pretty swamped with punch list tasks when I made it (a few weeks ago, absolutely as soon as I had an oven and enough of my baking stuff organized) I kept it pretty simple.


This is a fine bread for sandwiches, toasting, or just enjoying with butter and jam or to find the last drops of a good stew or soup. Thank you Ilva for choosing just the right recipe for trying out the new kitchen.

Do visit the blogs of our other Babes, too, to see their take on this delightful bread.
Bake My Day - Karen, Blog From OUR Kitchen - Elizabeth, Bread Experience - Cathy, Girlichef - Heather, Life's A Feast - Jaime, Living in the Kitchen With Puppies - Natashya, My Diverse Kitchen - Aparna, My Kitchen in Half Cups - Tanna, Notitie van Lien - Lien.


ROBERT MAY'S FRENCH BREAD
from Elizabeth David's English Bread and Yeast Cookery

500 g/ 1 lb 2 oz preferably a half-and-half mixture of unbleached white and wheatmeal
15 g/ 0,5 oz of yeast (fresh)
2 egg whites
280-340 g/ 0,5 pint to 12 oz water and milk,preferably 3/4 water and 1/4 milk (perhaps a bit less liquid)
15 g/ 0,5 oz salt

- Warm flour and salt in a very tepid oven. (you can skip this - I did)

- Pour in the yeast creamed in a little of the warmed milk and water mixture. Add the egg whites, beaten in a small bowl until they are just beginning to froth. Pour in the remaining milk (but not all at once like I did, I had to add more flour to get the right consistency). Mix as for ordinary bread dough.

- Leave to rise until spongy and light. This will take 45 minutes to 1 hour depending on the temperature of the ingredients when the dough as mixed.

- Break down the dough, divide it into two round loaves-or long rolls if you prefer. (I made one oval loaf). Cover with plastic or a light cloth and leave to recover volume. About 30 minutes should be enough.

- Decorate crust with cuts or not. Bake in a pre-heated oven (230°C/450°F) for the first 15 minutes. Then to prevent the crust to get too hard, cover the loaves with bowls or an oval casserole. In another 15 minutes the laves should be ready. (I did not cover my loaf because I had nothing of that size of shape that I could use so I lowered the temperature to 175°C/350°F and left it in for another 15-20 minutes, but I did use a bread/pizza stone.)

Friday, September 12, 2014

Gluten Free Baked Lamb Meatballs


It's been great being back in the kitchen cooking. I had no idea that finding new homes for all my cooking and baking equipment and supplies would be so challenging. It isn't that there isn't room, nor that I hadn't planned where to put most of it, the problem is that I find that where I thought things should go is not truly where they fit best when actually using the kitchen. That means rethinking a lot of my original plan.

I look pretty crazy sometimes as I open and close drawer after drawer and door after door of the cabinets, looking for a whisk or grater, a citrus juicer or colander. Some things have been moved four or five times since the project started and my memory just isn't what it used to be.


Still, I wouldn't go back to the old kitchen and I love all of the work space. I even used the little table this week while I was preparing pounds of home grown, just picked cherry tomatoes for roasting. Sitting instead of standing to remove all of those little tomato tops before I prepared them for roasting was a treat. After the tomatoes were roasted I decided that as long as the oven was hot, I could make meatballs for dinner.

I had thawed some frozen ground lamb from the freezer and somewhere recently I read a recipe where they used almond meal instead of bread crumbs for making meatballs, so I decided to see what I could come up with using items already in the pantry and fridge. I'm not eating gluten free myself, in general, but it's always nice to have a dish to make that is when I might have guests who need to eat gluten free. This dish is not vegan or vegetarian however, but it is dairy free. Because Sweetie is not a big fan of mint, it is a mint free dish, too. Mostly I would make these again because they were awesomely yummy.

There was just over a pound of ground lamb. The fridge had a wonderful caramelized red onion and fig conserve, some Dijon mustard, an egg yolk left over from another recipe, eggs, fresh basil, and the almond meal. The pantry had salt and pepper. That was all I needed. Because the onion and fig conserve was ready to go and very full flavored, the meatballs went together very quickly.


I scooped them on to a foil lined baking sheet and baked them in a 400 degree F oven for about 18 minutes. I was going for 20 minutes, but they seemed to be done at 18 and I hate overcooked lamb.


A key thing to remember if you decide to make these is to handle the mixture lightly. That keeps 'em tender and juicy. The other thing to know is that they may flatten just a bit, so don't expect tight, round meatballs. Instead look forward to light, juicy, delicious meatballs with some crispy bits where they sat on the pan. The lamb flavor shines and is enhanced by the slightly sweet onions and figs. The mustard and basil are background flavors and I didn't really taste the egg or almond meal at all. You can serve them with some more of the conserve or a bit of tomato sauce, or some yogurt...all three would be good. I served them with a neighbor's gift of fresh from the garden broccoli, which I roasted with garlic, and corn on the cob, and that was wonderful, too.


Elle's Gluten Free Baked No Mint Lamb Meatballs

1 pound ground lamb
1 egg yolk
1 medium or large egg
1/4 cup caramelized red onion and fig conserve (any kind of onion-fig jam or conserve will work)
1 tablespoon Dijon mustard
1/2 cup almond meal (ground blanched almonds)
2 - 3 tablespoons minced fresh basil
salt and pepper to taste (I used 1/2 teaspoon salt and 1/4 teaspoon freshly ground pepper)

In a mixing bowl, using a fork, lightly stir together the above ingredients. Scoop balls about the size of a walnut on to a foil lined baking sheet, leaving about an inch to two inches between balls. (You can make the meatballs any size you like, but the smaller size bakes more quickly than larger ones.)

Bake in a preheated 400 degree F oven for 12-20 minutes. Check after 12 minutes to see how done they are - they should be browned around the edges and spring back a bit when prodded - turn the pan 180 degrees and continue baking until done.

Serve at once and enjoy! Serves 3-4.

Tuesday, September 09, 2014

Cookies From A Pot


Do you have a favorite snack for times of stress? Lots of folks turn to ice cream and that does have the advantage of being ready to eat from the carton, it come in lots of flavors, and all you need is a spoon.

I tend to go for cookies. When I knew I would be without a stove for a while I baked some blondies, and that really helped. Once they were gone I wished that I had made butterscotch cookies, so I looked here on the blog for the recipe. No way I was going to find the recipe in my recipe card file because the file had disappeared into the whirl of items that used to live in the kitchen cupboard but now were temporarily housed elsewhere for the kitchen remodel. Turns out that I never put up a post on butterscotch cookies, so I had to wait until I found the recipe box. About a week ago I spotted it on a window sill behind a curtain. Sure enough, there was the recipe I wanted, so I brought it inside and put it by the flour in the new baking center. I decided that once I was able to bake again that it would be the first thing I made.

Today was the day! The stove is working, I have sinks in working order and a dishwasher. The new drawers and shelves are starting to be put to use as I sort out my kitchen things and find new homes for them. One of the nice things about this recipe is that you can make the batter in a good sized pot. No mixer needed!

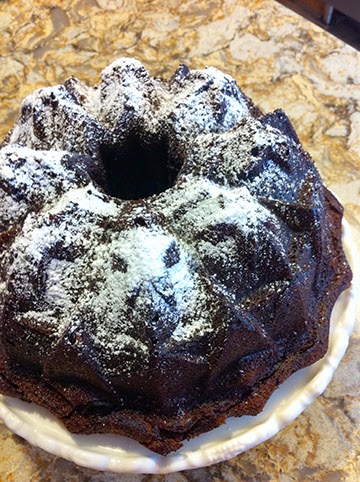
You start with a lot of butter. It gets melted in the pot, then you add a lot of brown sugar. That gets stirred together. I usually let it cool a bit and today I was blessed by a phone call from a friend so we caught up while the mixture cooled.

Once the butter/sugar mixture cools a bit, you beat in the eggs, then, all at once, add the dry ingredients, nuts, chocolate chips and vanilla. As long as your pot is big enough, all this can be done in the same pot you melted the butter in. The batter gets turned out into a greased baking pan and spread out, then it's into the preheated oven. It doesn't take long before the house smells absolutely delicious! This is a very aromatic cookie. After cooling you can cut them into bars of whatever size you like. I wish I knew where I got the recipe from, but the index card gives no clue. It is liberally stained, which shows that I've enjoyed these many times over the years.

These bars of delight ship well and keep well if you can keep them hidden. I usually freeze some so that I don't eat the whole pan in a day...I like them that well. Fortunately we are down to the punch list so my stress level should be pretty low for a while. I bet I make these again before Christmas!

In case you have been following the madness of the kitchen remodel, I'm going to include a photo and am happy to say that the last of the paint touch ups was done today. All appliances, cabinets, floor, sinks, faucets, drawer and door handles on the cabinets, hooks, garbage containers and all but one of the towel racks have been installed. Most of the shelves and drawers are lined, and some are even filled. We found a good buy on bamboo drawer dividers at Costco, so lots of items that can go in them are in drawers and in order. Now I just have to remember which drawer they went to!


I hope to post a lot more often now that I should have more cooking and baking time. I made some amazing lamb meatballs last night which I need to share with you before I forget the ingredients I threw together, plus there are a few things I've made in the last week or so that were too good not to share. Hope you have checked out some of the older posts. If you have a way to go to classic web version there is a photo of a table setting which is a link to the recipe index. The index is a little out of date, but there are some hidden treasures there if you look for them.

Chocolate-Butterscotch Bars or Squares 
Makes 40 squares - not sure how many bars

2/3 cup butter, margarine, or vegetable shortening, melted
1 1/4 cups brown sugar, packed
3 eggs
2 3/4 cups all-purpose flour
1/2 teaspoon salt
2 1/2 teaspoons baking powder
6 oz chocolate chips
1 cup chopped nuts
1 teaspoon vanilla

Mix melted butter and sugar thoroughly. Let cool a bit. Add eggs one at a time, beating well after each addition. Add sifted dry ingredients, chocolate, nuts and vanilla and mix well to combine.Spread in a greased 15" x 10" x 1" pan. Bake in moderate oven (350 degrees F) for about 25 minutes. A toothpick inserted in center of pan will come out with a few crumbs stuck to it.

Cut into 40 squares (or some bars if you prefer) while warm. Store in airtight container. Will keep a week if you don't eat them all long before that as I do.